Tuesday, April 9, 2013

Pastel (wax or crayon) Stamping How Too / Tipnique Tuesday

Hi everyone
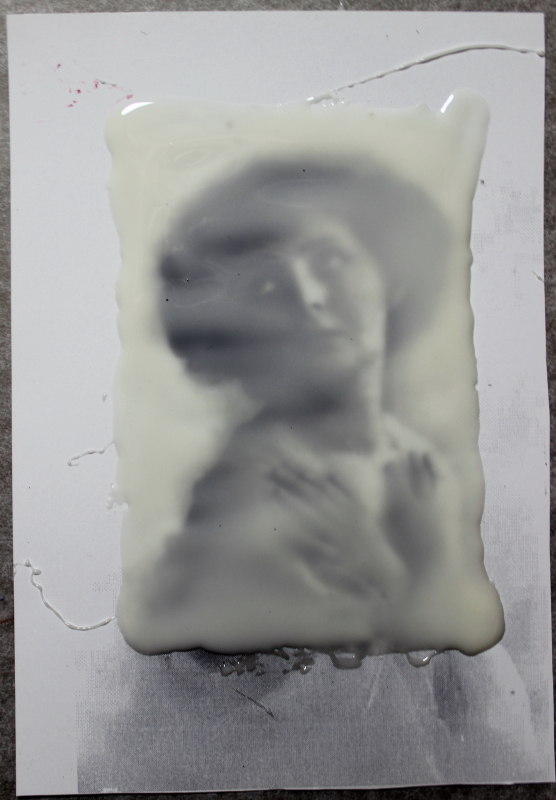
this Tuesday I shall share a technique I discovered myself. Don't get me wrong as I am under no illusion some one some place else hasn't done this as well but this is what I came up with one day on my own. I don't think I have seen it on others blogs. When I pulled this page open in my tips and techniques book I was actually surprised at how well this sample below had kept as I think it was about 10 yrs ago I stamped the piece with pastels and filed it away. The pastel stamping was done on acrylic painted over canvas sheets. Image 1 is flash off and image two flash on. As you can see this technique gives you images that look water coloured and ghostly. The more pastel you apply can give you raised texture when you stamp.


MATERIALS
  • Crayola Portfolio Series water soluble oil pastels. Other crayons/pastels may work but I haven't tried them
  • Stamps of choice. Bold stamps without too much detail work best
  • Heat gun
  • Something to stamp on such as smooth water colour paper, canvas sheets, card stock etc etc
HOW TOO
1) Have the oil pastels, heat gun and what you want to stamp on close by as you need to work fast for this technique


2) Colour directly on the stamps with colours of pastel of choice


3) Apply heat to the stamp. The wax melts and takes on a shiny appearance so as soon as it looks "wet" turn off heat gun and stamp onto chosen surface


4) When done wash stamps in warm soapy water to get the wax colour off.

As I wanted to show you clearly what to do I was using smooth water colour paper that was not coloured before I stamped. In the image below the center flower was re stamped without adding any further pastel colour as soon as I lifted the stamped image at the left. It gave a faded look


I made this into a quick card by colouring the back ground with water colour pastels using the wet on dry method. That is a wet brush loaded with my colour onto the dry water colour paper. Image one is flash off and image two flash on


Here is another sample with the background pre coloured with sprays on the smooth water colour paper before I did the pastel stamping. Image one flash off and image two flash on


 Lastly another sample again on pre coloured, smooth water colour paper. Image one flash off and image two flash on.


Here is a little video of the technique for you if you prefer to watch the process here


As I said in the past when I do these tips and techniques I'll make the process easy enough for beginners to achieve the end result OK but if you want to go for full on mixed media effects go for it :o). My Translucent liquid Sculpey transfer from last week has become a WIP (work in progress) as I had partly machine sewed it to a calico bag when my old sewing machine died. I can't afford a new one for a few weeks but when I do I'll finish that project.
hugs
Annette In Oz

Wednesday, April 3, 2013

What's On Your Workbench Wednesday (WOYWW)-200

It's time for WOYWW again. For the details go to Julia's blog and see what's it all about. My desk this week is a a bit cleaner on the paper crafting end. I had just cleaned it up a bit last night before bed after making a Translucent Sculpey Transfer (see the post below if you want to know how these are done). This is my busy week at work so I haven't got any jewellery made on my jewellery making end of my desk. On the Paper crafting side I did get another 2 mixed media cards made. One is made from the mixed media background that was on my desk last WOYWW. I stood back a bit to take this photo so you can see that all my goodies are in stackable draws at the left. Ink pads and frequently used items are at the back of my desk. The iron is my handy craft iron and NOT for ironing clothes LOL.
It's Wet season now so you can see out the window it's very green outside. Wet season brings us 6 months of on/off rain and it's also our Cyclone season. Thankfully this year there have been no Cyclones our way. We have had less rain then usual too so its been very hot and humid too. Wet season ends at the end of the month and then it will be...you guessed it The Dry Season LOL. I live in the tropics so we do not have 4 seasons just 2. Both seasons play havoc on my art supplies like you wouldn't believe!


These are the two cards I just completed. My ring mandrel acts as a washi tape holder at the right of them LOL. The disposable tray in the front of the card at right with the yellow and deep orange colours on it are the Luminarte Primary Elements Polished Pigments colours I used on the card behind it...there are allot of metal embellishments on that card and the Polished Pigments stick to metal beautifully. Oh there is also a small dish of used bullets a friend gave me to use in my mixed media stuff


Here a close up images of the cards....the first one has the Words hidden on it that say "Magic Can Happen".


and this one has "My friends in art"on it.


I cleared the left side of my desk as I intend to make some jewellery on my next days off so want to spread out. I suspect next Wednesday that's what you shall find on my desk then :o). Off to look at other's desks now
hugs
Annette In Oz

Tuesday, April 2, 2013

Translucent Liquid Sculpey Transfers / Tipnique Tuesday

This week I will share how to do a type of transfer using Translucent Liquid Sculpey (TLS).  A transfer allows you to transfer an image or words onto projects where a normal printed image wont suffice such as onto metal, wood, fabric etc.'TLS transfers can be easily cut with scissors, have holes punched thru it or can be sewn by hand or with a sewing machine. They are transparent so look good over wording or decorative papers. They are water proof as well. For these transfers you need a toner copied image or you can use your own drawings with coloured pencils. I haven't tried this but I have read you can heat set inkjet printed images by placing them in the oven on 200 degrees Celsius for 5-10 minutes and then they will act like a toner printed image.

MATERIALS
  • Translucent Liquid Sculpey (TLS) or other liquid polymer clay
  • Toner copied image. I used a laser printer and my image is printed on Kodak gloss photo paper. Mirror image your print as needed and especially if you are transferring writing 
  • Baking parchment-I have used Glad Bake 
  • A flat baking tray, an oven and a oven thermometer. The TLS has a mild smell but is safe to use in your oven in a well ventilated room.
HOW TOO

1) Heat set oven to manufactures instructions on your bottle of liquid polymer clay. I used the Sculpey brand so had my oven on 130 degrees Celsius (275-300 degrees F). Use an oven thermometer to check temperature is correct. Place baking sheet on baking tray, image on top and then squeeze TLS all over area you want to transfer


Gently spread it all out evenly and ensure there are no holes/air bubbles. I just used my finger to do this but you can use a palette knife etc if you want


2) Place tray in oven and bake to recommended time on your bottle. TLS recommends 15-30 minutes so I cooked mine for 20 minutes. Remove from heat and allow it to cool to touch. As the TLC bakes it becomes more transparent.


3) Once cool peel off your transfer.


As you can see the transfer is see thru. You can colour it using permanent markers or other mediums if you want


I'll try to make my transfer into a card or something later in the day or the next few days and post it here. I think I may even sew it onto my background I have done above. As I have long had a love of making transfers I think there will be more tipniques featuring them in the future using other media as the transfer agent.
hugs
Annette In Oz

Sunday, March 31, 2013

Magic Card How Too-Video

At last I've been able to upload the videos of how to make a magic card. I did the how too over three videos as I thought that would be easier to upload. Here is the first one..


and the second....


and the last part


Hope they load OK. Oh if you notice I start using a different coloured dress on the stamped image its because I was making three of these at once and just picked up a different one to what I started with....the steps are the same though. Writen instructions are here
hugs
Annette In Oz

Wednesday, March 27, 2013

WOYWW-199

Hi all
I decided to join in on the "What's On Your Workbench Wednesday" where artist/crafters from all over the World share what is on their work bench each Wednesday. As I work every Wednesday evening and am not home till 11.30pm  my sharing will be later then others. I did check pre work but the link post wasn't up yet.. It all started from here at Julia's blog. Anyway my desk is a large table and on one end I create paper craft/mixed media items and on the other end I make hand made jewellery. So first shot is the paper craft end complete with some new Tim H stuff that came in the post yesterday!!


And other side at right is my jewellery making side


On the paper crafting side I have three Magic Cards. On Tuesday I share an old paper crafting tip or technique and that post was Magic Cards this week...the how too for them is here.As you pull them out the colour appears like magic.


There is also a GORGEOUS hand painted ATC that I recieved from Lauren


2 other awesome ATC's from another friend Glenda


A water and drawing ink bg with a gorgeous stamped image awaiting a card transformation.


A mixed media background waiting to be made into a card tomorrow

 A completed mixed media card made for my sisters birthday that I have to send tomorrow. Closer images here


Then over at the jewellery making end I have these amazing Prima Junkyard light bulbs that are screaming at me to make them into necklaces!!


Some of my hand etched items waiting to be made into cuffs and necklaces


I'm into "puffing" metal of late as well as I like steam punk so this is a partly finished steam punk puffed eye ball and a puffy heart awaiting a steam punkery treatment.


Some Ice Resin filled bezels


A polymer clay doll that needs painting!!!


A closer look at my etched puffy heart and a completed etched bird house necklace. The other day I had tried to make an etched copper ring and just couldn't do it so tried making a bird house as the bends etc were larger and I could solder that Ok...I'll retry the ring soon.


There you go that is what is on my messy work bench this Wednesday :o)
hugs
Annette In Oz

Tuesday, March 26, 2013

Magic Card How Too / Tipnique Tuesday

I first saw this in one of my children's books over 15 yrs ago and ended up dismantling the book so I could see how it was done :o). I'm not sure what the actual card or technique is called but I used to call it a magic card. This card looks pretty plain from the front but as you pull it out from it's pocket the colour is revealed like magic!


MATERIALS
  • 30cm square piece of card stock (or 12 in square)
  • A 10x15cm piece of scrap white card stock plus a small scrap piece of white card stock
  • Stamp of choice
  • Pencils or colour medium of choice
  • A piece of acetate about 12x17cm in size
  • Stazon black ink or other ink suitable for non porous surfaces
  • Small and large circle punches
  • Hole punch such as Japanese screw punch with small bit for eyelets and brads
  • One eyelet and eyelet setting tool of choice
  • 2 brads
  • Pencil, rubber, ruler, craft mat, craft knife, bone folder and glue
HOW TOO
1) Start with the 30cm square card stock. Fold it in half and run bone folder along the folded edge.


2) Open card stock and have it so the fold is running left to right. On top and bottom edge measure and mark a dot at the 10cm and 20cm mark. Use bone folder and score along these marks from top to bottom


3) Cut away the lower left and right side with your ruler and craft knife to make a large "T"shape


4) Trim the lower remaining panel at the sides a few mm and about 1cm off the bottom.


5) In middle top panel make a 2cm wide frame so it looks like the image below.


6) Use small hole punch and punch a half circle at the top of the frame. Repeat on other top panels if you like


If you fold the bottom up and then the two side panels in it makes a pocket and will look like this


7) On the 10x15cm white card trim a few mm of each long side. Place it in the pocket to check it will slide in freely. Trim further if the fit is too tight.


8) Trim a further few mm off the long sides but leave a little wedge at bottom to make an upside down "T


9) Stamp image of choice on the upside down "T" and also onto the acetate. Put acetate aside till dry. While waiting for it to dry colour your image as  desired on the upside down "T"


10) Place the acetate back on top and completely align the two images. Be very careful, hold the aligned pieces firmly and use a ruler and your knife to trim the acetate to the same size as the upside down "T"


11) Use paper clips to keep the acetate over the image in correct alignment. You are not seeing things....the image colour has changed in the next photo as I was making three of these at once and picked up the girl in black instead of the the one in purple but the step is just the same for both :o)


12) Punch a larger circle from scrap card. Fold the circle in half and place it mid way across both the acetate and the card. Hold it firmly and punch a hole thru all layers. Set an eyelet in the hole


View from back


 13) Fold the bottom panel of the large T up.


Slip the upside down "T" and acetate over the top of the folded up central piece so acetate is at front toward the frame and coloured image behind


14) Fold in that panel. Fold left side in and apply glue to the back and  fold right panel in on top of glued area.


 15) Punch a small hole at top left and right and insert bards. The upside down "T" part will catch on these and stop the slide panel falling out.


There you have it your very own magic card :o)


These are awesome cards and really simple to make. I did do a video and shall try to add it later in the day :o)
hugs
Annette In Oz xxxx

LinkWithin

Related Posts Plugin for WordPress, Blogger...