Monday, August 8, 2011

Lampwork beads, a necklace and some yummy mail.

I can't believe how fast paced my life has been this year. Having visitors here for nearly 2 and a half months has reduced ny arty adventures as my art room has had people sleeping in there with beds literaly tucked right up too and under my desk LOL. My influx of visitors coincided with a wonderful friend Gail Hart from Tasmania staying at her sons place here in Darwin. I couldn't get up to see Gail till the last few weeks but when I did go I was in for a real treat as she has taught me the basics of lamp work bead making...and another door to arty goodness opens.
I'm still a huge novice but I LOVED the whole process and Gail is helping me set up the basic requirements to continue playing in this area. I can now make smallish round beads Ok but the stringers and adding them plus making larger beads awaits further practice practice practice. Gail is an amazing glass bead artists and I could have just stood there watching her all day making the beads....she leaves for home Wednesday Wah...I do hope she comes back again :o). Gail is such a kind, lovely person and  VERY patient when teaching someone like me who has shaky hands with glass and gas around  *grin*. Thank you Gail. Here are the beads so far...the larger one and the heart plus some others were made by Gail.

My nephew and his girlfriend have been staying in town for this week so I had a few days to get in the art room and sort stuff for trip to New Zealand next month which is fast approaching. There are plastic bags of brass, charms, Yuzen papers, tassels and so on all over the place!!. While clearing the desk to post said items I found a partly finished leaf form dancer necklace so finished making her. She has ice resin over paper like the others I have made. Her body has the words "infinite passion for life" in it.

Just because I can't do much art at the moment doesn't mean I don't think about and buy art supplies LOL. Just look at this awesome stuff from the retrocafe that has come. The Vari-tone ink used with stencils or other things LOL gives graduated ageing spots...the more ink and heat the darker the aged look.

 OMG I sssoo love old German doll parts. I have never seen such a small frozen Charlotte and doll arms make great hangers for necklaces....and then there are those amazing glass eyes...

 More shrines and trinkets to await altering..

 tiny watch part vials....one even has some small watch parts still in it yeha

 and old optical lenses and acrylic cut charms...oh how I love that shop LOL

Now all I need is time to get some art done and my art space back to do so. It will all come together sooner or later :o). On the other hand we may have been busy but we have loved having the visitors here too as we don't see relatives for years at a time. It just happened that we got 7 visiting all around the same time!!!. Oh and did I mention the oldest daughetr Carlia and her boyfriend are now back living with us too?. I didn't change the locks quick enough LOL.
hugs
Annette In Oz

Sunday, July 24, 2011

Heart and Mexican Wing Themed Shrine

My nephew and his lovely girlfriend are staying with us at the moment for several weeks and I keep forgetting or running out of time to get these images up. Anywho here are the last 2 shrines we will be making in NZ....the first is a 2 hr class so I kept this one simple and had a love theme for it. The large heart is Vilene and Cuttlebug embossed with a matchbox draw under the door. I used metallic paints, primary elements powders and angelina fibres on it so its quite shimmery IRL.


Then the last class is an all day one. I went for a Mexican style altered shrine with a wings theme and grunged it all up using stamps, paint, embossing, resin filled bezel and so on.


Next thing I need to do is get in my room and start sorting and making things I need to bring with me to NZ. There is my son in there at the moment while our guests use his room but it will all get done one way or another LOL. May sneak in some jewellery too as I have wanted to make another resin leaf form dancer for myself since I gave away my other two!
hugs
Annette In Oz

Thursday, July 14, 2011

Oriental/Asian Themed Shrine

We had a month of family visiting and then 2 weeks break and I finally got a few days to myself to complete the last three shrines we will make in New Zealand. The Engineer necklace shrine will be the first and this will be the second one. I went for some recycled elements and used an empty but clean sardine tin as the shrine base. It's an oriental or Asian themed shrine.
The door is etched metal.

 Frame holds an Pipedreamink Opals embossing enamel frame.

 Under the door is an inkjet water transfer to calico.


 Contents in the rear of the shrine.
 Just had to add a scroll LOL.

Will show you the last two shrines soon. My lovely nephew Craig and his lovely girlfriend Lisa have just arrived for a few weeks now....maybe its the Universes way of keeping me from freaking out about going to NZ to teach for the first time *grin*
hugs
Annette In Oz

Sunday, June 19, 2011

Hand Made Cards

Oh my I got so side tracked with visitors for last few months that I forgot 2 peoples birthdays. Here are a few more cards made recently. The first one I have used some of my grungy bg I made a few days ago. Image is from Creative Individuals. Gail Hart sells their stuff in Oz. Missed this persons birthday by a week!. It will be in the mail tomorrow.
 A closer view.

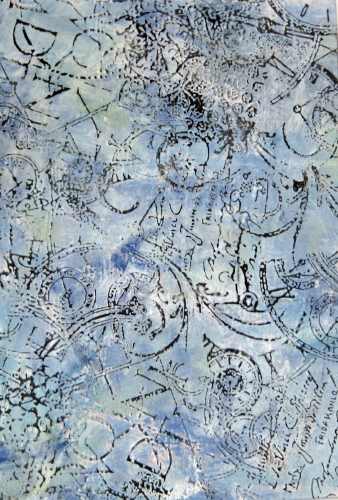
 We then got  a call from Grant's Mum and she let us know we forgot Grant's nephew Ryan's birthday as well. So I made a lovely messy bluish grungy bg.

 Then I added this sad or sorry looking boy. His crown looks "whole" in real life.I used some mica powder on it and the light isn't reflecting off the whole crown when I take a photo. I'm a month late with this one!!!. It too will be in the mail tomorrow.

 Closer view.

 This one I actually made and sent on time LOL. It was for Jen Crossley whom I also made the friendship necklace for.

It was very daunting making Jen a card and necklace as she is humungously talented herself. I even managed to send this one early LOL. Hope I do better during the year with birthdays.
hugs
Annette In Oz

Friday, June 17, 2011

Arty Ironing Ideas

Hi all
I was meant to be ironing and got side tracked thinking of all the arty things you can do with an iron so started a list in Facebook. Here is the list so far. Anyone got some more?
(NOTE: Gladbake is baking parchment and Gladwrap is plastic food wrap...the cheaper brands work best!!)
(1) Heat transferring images to card, metal etc. To do it onto metal sand with fine sand paper, spritz with acetone , place toner printed image side down and iron on hot setting no steam to transfer the image to the metal
(2) Ironing patterns in Angelina fibres with stamps-place fibres on top of stamp, cover with Gladbake and iron on hot setting no steam. Image will imprint into the fused fibres
(3) Same with velvet by spritzing fury side of velvet first with water, lay wet side down on top of stamp, add sheet Gladbake and then iron firmly no steam....image will imprint in the velvet
(4) Ironing Opals embossing enamels to make Opals paper and then - sprinkle opals onto Vilene with or without tissue material on top or on material itself and iron between Gladbake...opals melt and embed in the base...opals paper
(5) Can use Lumiere paints or alcohol inks to colour Opals paper, Cuttlebug emboss it, sew thru it, place over a stamp add Gladbake and iron on top, leave till cool and peel up stamp to imprint image into the opals paper
(6) Heat transferring foil onto toner images-place foil over toner printed image, Gladbake on top and iron. The foil will stay on the image
(7) Ironing crayon shavings onto water colour paper
(8) Making T-shirt transfers-use the T-shirt paper, print image on top and iron image to other surfaces...not necessarily onto a T-shirt LOL
(9) Making Opals embossing enamel transfers from toner images-apply a very wet layer of Versamark watermark ink to a toner printed image, glossy mag image or wrapping paper etc. Sprinkle on clear Franklin opals and iron or pour pre melted Franklin on top. Leave till cool. Opals will sink into the paper a bit. Place opals/image in warm water and rub off the back. Image will be transfered to the opals. Can colour it with Lumiere paint, alcohol inks etc
(10) Ironing tissue paper, material etc to vilene with vliesofix ready for colour wash spraying, Can sew it, stamp it, Cuttlebug emboss it etc
(11) Drying wet card stock
(12) Ironing pleats etc into wet cardstock or paper
(13) 'altering' shopping bags between 2 sheets baking parchment
(14) Iron 4 or 5 layers of bubble wrap together (one layer at a time between baking parchment !) creates interesting plastic that can be punched
(15) Making toasted sandwiches in a hotel room ! (Iron between baking parchment !)
(16) Ironing Lumiered and stamped Gladwrap to card etc between Gladbake
(17) Faux batik-stamp with clear ink or pale ink of choice onto water colour paper. Sprinkle on clear embossing powder and heat set/melt it with heat gun. Sponge on colour with inks, spray washes etc. Place paper towel on top and then Gladbake on top of that and iron-raised embossing powder disappears=faux batik
(18) Encaustic wax painting
(19) Apply water colour crayon to stamp, put cardstock on top and iron
(20) Encasing glitter, shiny shiva mirrors, tiny shiny plastic shapes and Angelina fibres etc between organza or other sheer material. Use Vliesofix on base material, sprinkle on the shiny things, organza on top, Gladbake on top of that and iron on a lower heat....crazy stitch away or not *grin*
(21) Squeeze lemon juice and use as an ink on cardstock or paper..it’s invisible till heat applied with heat gun or iron...use lemon juice sponged onto card with a sea sponge and then iron for interesting effect
(22) Varitone ink sponged thru stencils and ironed makes for cool aged looking backgrounds...the more heat you apply the darker it gets. I got some from
http://www.retrocafeart.com/ and the cutest tiny 1inch frozen charlotte plus other amazing altered retro art bits.
(23) Faux carnival glass as per Zeborah Loray(an amazingly arty friend in USA). Apply 3 layers of black Currawong Opals embossing enamel (or other dark colour)onto a base like card, glass, wood, metal etc using an iron or heat gun. On top molten layer apply Fantasy film or other. When cool apply 2-3 layers Franklin clear opals on top with iron or heat gun. Press a stamp on top while molten and leave to cool. Peel stamp up and tada faux carnival glass
(24) Found this one out when I was ironing Fantasy Film or Angelina film...if you have yr iron too hot it makes tiny honey comb effects with the shiny film. Makes a gorgeous bg
(25) Squeeze out some transluscent liquid sculpey onto some Gladbake, spread it out evenly with finger and ensure there are no air bubbles, lay toner image face down on top, add another sheet Gladbake and iron on hot with no steam till TLS sets. Peel off image and it will transfer to TLS. You can cut, Cuttlebug emboss it, sew it, colour it etc. Ohh...I've coloured the TLS with mica powders pre transfer and also applied TLS on a base first like skeleton leaves or sheer material for interesting effects. Can apply the TLS directly to the toner image first as well.
(26) Nappy linner rubbing. Use cheap nappy(diaper liners) liners and make a rubbing from a textured surface with Shiva paint sticks. Place rubbing over base card or material, Gladbake on top and iron-no steam. Nappy liner will melt in parts and stick to base
(27) Just remembered Press-n-peel used for transferring an image of a circuit board plan onto copper pre etching. Could use the same idea but use family photos made into digital "stamps" in photoshop...there is a how too at art-e-zine here Make digi stamp, print it on Press-n-peel, place image side down on prepared base metal and iron on hot setting no steam with firm pressure. Image is now on metal and has a built in resist so can be etched!!. Here is a longer how too and more info about it
(28) Tyvek-iron between 2 sheets Gladbake. One side becomes 'bobbly' and the other 'spider-webby' Oh and remember there are a couple of types of Tyvek. Smooth- thick and thin. Textured- Linen like and industrial. All VERY ineteresting !
(29) You can use Gladwrap as a glue to bind 2 things together. Just put a sheet between two peices of cardstock, cardstock and paper, 2 pieces material etc . Iron between Gladbake. The plastic melts and "glues" the items together
(30) Reynolds freezer paper- has a plastic coating that melts so can be used as a binder when ironed. I esp like to use this when I want to feed material thru the printer. Cut material and freezer paper to A4 size. Place material on top and iron between Gladbake. The material will now be stuck on the freezer paper and can be fed into the printer(ensure any loose threads are cut close to the freezer paper edge). It easily peels off again when you need to use the printed fabric!
(31) Making "stary night scene" on black painted cardstock or black materials etc using Super mend sprinkled on(its like fine sand and is a glue in powder form used on material..or otherLOL) and then iron gold, silver or hologram foil over top(with Gladbake between foil and iron). Foil sticks to Super mend sprinkles= stary night!!
(32) Faux stained glass. Use heat reistive film for laser printer-sticky backed clear if you can get it. Stamp an open pattern on smooth side with Stazon black ink. Press lead lighting strips onto the stamped image lines. Iron fantasy film, angelina film etc chunks to rear inside the lead strip guides. Sprinkle on Franklin clear Opals and iron between Gladbake

hugs
Annette In Oz
who just got some awesome stuff from the http://www.retrocafeart.com/ today...will share photos later...I really have to get the house work DONE!!!!

Wednesday, June 15, 2011

Getting My grunge On

I'm working on several projects at once on my desk. As a part dries on one I work on another. In amongst the growing mess I quickly made a 50th birthday card for my brother Steven. The image is him at 7 months old.I adjusted the colour in Photoshop. Here is the original.

I got all ink and paint stained doing the next part but I loved it LOL. I made a grungy background for the image to go on. I was reminded about making a grungy bg when I visited Chris Arlingtons blog post.

Add some stained gauze, some cogs, a wing, dictionary words for "brother", a fuse, an old tape measure and a party hat and tada
Better get it in the post tomorrow...only a week late but better late then never.
hugs
Annette In Oz

Tuesday, June 14, 2011

Visitors Galore and Silversmithing No More

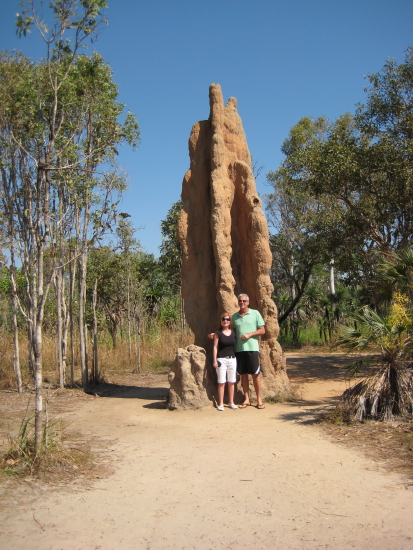
We have had a busy but great time with My Mum and Aunty Marg here for 2 weeks followed by my sister. Colleen and her hubby Jim for another 2 weeks. We did all the tourists spots with both so had 2 trips tp glorious Kakadu, Litchfield, Katherine Gorge etc etc. Here is Col and Jim in front of a rather large Cathedral Termite mound.Jim is around 6ft tall so you get an idea of the mounds real height!!!


Col and Jim at Ubirr in Kakadu with the flood plains behind them


We stayed and watched the sun set. It was quite over-caste but we watched...and waited...

 aaahhhh another glorious sunset over the Northern Territory of Oz

 While Col and Jim did the Katherine Gorge cruise Grant and I went on a walk above the escarpment and found this curious rock monster by the path. I think someone had too much time on their hands LOL.

Along with visitors leaving I did my last Silversmithing class this week gone. I had made two diffrent sterling silver wire twists. I made one into a bracelet as I actualy didn't own any bracelets.
and the other piece was smaller so once I had rolled it I made a set of hoop ear-rings out of it.


I'm already missing my visitors as we do not see people we know for years at times. Col and Jim had never been to the NT and loved it so hope they come back and see us again soon. Well the house has just been cleaned, 6 loads of washing done and all the guest linen etc put away. HHHmmm maybe tomorrow I can get into that art room and sort thru some of the half finished projects on my desk!!
hugs
Annette In Oz

LinkWithin

Related Posts Plugin for WordPress, Blogger...