Hi all
I was meant to be ironing and got side tracked thinking of all the arty things you can do with an iron so started a list in Facebook. Here is the list so far. Anyone got some more?
(NOTE: Gladbake is baking parchment and Gladwrap is plastic food wrap...the cheaper brands work best!!)
(1) Heat transferring images to card, metal etc. To do it onto metal sand with fine sand paper, spritz with acetone , place toner printed image side down and iron on hot setting no steam to transfer the image to the metal
(2) Ironing patterns in Angelina fibres with stamps-place fibres on top of stamp, cover with Gladbake and iron on hot setting no steam. Image will imprint into the fused fibres
(3) Same with velvet by spritzing fury side of velvet first with water, lay wet side down on top of stamp, add sheet Gladbake and then iron firmly no steam....image will imprint in the velvet
(4) Ironing Opals embossing enamels to make Opals paper and then - sprinkle opals onto Vilene with or without tissue material on top or on material itself and iron between Gladbake...opals melt and embed in the base...opals paper
(5) Can use Lumiere paints or alcohol inks to colour Opals paper, Cuttlebug emboss it, sew thru it, place over a stamp add Gladbake and iron on top, leave till cool and peel up stamp to imprint image into the opals paper
(6) Heat transferring foil onto toner images-place foil over toner printed image, Gladbake on top and iron. The foil will stay on the image
(7) Ironing crayon shavings onto water colour paper
(8) Making T-shirt transfers-use the T-shirt paper, print image on top and iron image to other surfaces...not necessarily onto a T-shirt LOL
(9) Making Opals embossing enamel transfers from toner images-apply a very wet layer of Versamark watermark ink to a toner printed image, glossy mag image or wrapping paper etc. Sprinkle on clear Franklin opals and iron or pour pre melted Franklin on top. Leave till cool. Opals will sink into the paper a bit. Place opals/image in warm water and rub off the back. Image will be transfered to the opals. Can colour it with Lumiere paint, alcohol inks etc
(10) Ironing tissue paper, material etc to vilene with vliesofix ready for colour wash spraying, Can sew it, stamp it, Cuttlebug emboss it etc
(11) Drying wet card stock
(12) Ironing pleats etc into wet cardstock or paper
(13) 'altering' shopping bags between 2 sheets baking parchment
(14) Iron 4 or 5 layers of bubble wrap together (one layer at a time between baking parchment !) creates interesting plastic that can be punched
(15) Making toasted sandwiches in a hotel room ! (Iron between baking parchment !)
(16) Ironing Lumiered and stamped Gladwrap to card etc between Gladbake
(17) Faux batik-stamp with clear ink or pale ink of choice onto water colour paper. Sprinkle on clear embossing powder and heat set/melt it with heat gun. Sponge on colour with inks, spray washes etc. Place paper towel on top and then Gladbake on top of that and iron-raised embossing powder disappears=faux batik
(18) Encaustic wax painting
(19) Apply water colour crayon to stamp, put cardstock on top and iron
(20) Encasing glitter, shiny shiva mirrors, tiny shiny plastic shapes and Angelina fibres etc between organza or other sheer material. Use Vliesofix on base material, sprinkle on the shiny things, organza on top, Gladbake on top of that and iron on a lower heat....crazy stitch away or not *grin*
(21) Squeeze lemon juice and use as an ink on cardstock or paper..it’s invisible till heat applied with heat gun or iron...use lemon juice sponged onto card with a sea sponge and then iron for interesting effect
(22) Varitone ink sponged thru stencils and ironed makes for cool aged looking backgrounds...the more heat you apply the darker it gets. I got some from
http://www.retrocafeart.com/ and the cutest tiny 1inch frozen charlotte plus other amazing altered retro art bits.
(23) Faux carnival glass as per Zeborah Loray(an amazingly arty friend in USA). Apply 3 layers of black Currawong Opals embossing enamel (or other dark colour)onto a base like card, glass, wood, metal etc using an iron or heat gun. On top molten layer apply Fantasy film or other. When cool apply 2-3 layers Franklin clear opals on top with iron or heat gun. Press a stamp on top while molten and leave to cool. Peel stamp up and tada faux carnival glass
(24) Found this one out when I was ironing Fantasy Film or Angelina film...if you have yr iron too hot it makes tiny honey comb effects with the shiny film. Makes a gorgeous bg
(25) Squeeze out some transluscent liquid sculpey onto some Gladbake, spread it out evenly with finger and ensure there are no air bubbles, lay toner image face down on top, add another sheet Gladbake and iron on hot with no steam till TLS sets. Peel off image and it will transfer to TLS. You can cut, Cuttlebug emboss it, sew it, colour it etc. Ohh...I've coloured the TLS with mica powders pre transfer and also applied TLS on a base first like skeleton leaves or sheer material for interesting effects. Can apply the TLS directly to the toner image first as well.
(26) Nappy linner rubbing. Use cheap nappy(diaper liners) liners and make a rubbing from a textured surface with Shiva paint sticks. Place rubbing over base card or material, Gladbake on top and iron-no steam. Nappy liner will melt in parts and stick to base
(27) Just remembered Press-n-peel used for transferring an image of a circuit board plan onto copper pre etching. Could use the same idea but use family photos made into digital "stamps" in photoshop...there is a how too at art-e-zine here Make digi stamp, print it on Press-n-peel, place image side down on prepared base metal and iron on hot setting no steam with firm pressure. Image is now on metal and has a built in resist so can be etched!!. Here is a longer how too and more info about it
(28) Tyvek-iron between 2 sheets Gladbake. One side becomes 'bobbly' and the other 'spider-webby' Oh and remember there are a couple of types of Tyvek. Smooth- thick and thin. Textured- Linen like and industrial. All VERY ineteresting !
(29) You can use Gladwrap as a glue to bind 2 things together. Just put a sheet between two peices of cardstock, cardstock and paper, 2 pieces material etc . Iron between Gladbake. The plastic melts and "glues" the items together
(30) Reynolds freezer paper- has a plastic coating that melts so can be used as a binder when ironed. I esp like to use this when I want to feed material thru the printer. Cut material and freezer paper to A4 size. Place material on top and iron between Gladbake. The material will now be stuck on the freezer paper and can be fed into the printer(ensure any loose threads are cut close to the freezer paper edge). It easily peels off again when you need to use the printed fabric!
(31) Making "stary night scene" on black painted cardstock or black materials etc using Super mend sprinkled on(its like fine sand and is a glue in powder form used on material..or otherLOL) and then iron gold, silver or hologram foil over top(with Gladbake between foil and iron). Foil sticks to Super mend sprinkles= stary night!!
(32) Faux stained glass. Use heat reistive film for laser printer-sticky backed clear if you can get it. Stamp an open pattern on smooth side with Stazon black ink. Press lead lighting strips onto the stamped image lines. Iron fantasy film, angelina film etc chunks to rear inside the lead strip guides. Sprinkle on Franklin clear Opals and iron between Gladbake
hugs
Annette In Oz
who just got some awesome stuff from the http://www.retrocafeart.com/ today...will share photos later...I really have to get the house work DONE!!!!

Showing posts with label Opals. Show all posts
Showing posts with label Opals. Show all posts
Friday, June 17, 2011


Monday, August 3, 2009
Angelina Film and Opals cards
Today is my dear Grants 51st birthday and yesterday was my Melissa's (daughter) 18th.I quickly cleared my desk temporally of my metal supplies and made two cards.This is the one for Grant and has Angelina Film attached to Vilene and then I ran it thru the Cuttlebug in various directions changing the embossing folder each time.The vintage image was printed onto Lazartran water slide decal paper using and ink jet printer.
 and here is Melissa's 18th card.It has pieces of Angelina film attached to Vilene with Opals embossing enamel ironed onto the top.Then I placed them colour side down on a stamp with Gladbake(baking parchment)on top and ironed again to get the stamped image into the Opals.Leave it in place till cool before peeling up.
 I then rubbed Radiant Rain daubers over the top in a contrasting colour and while wet buffed it off again so the colour only stayed in the crevices.The stamped Image is an Oxford Impression one
hugs
 and here is Melissa's 18th card.It has pieces of Angelina film attached to Vilene with Opals embossing enamel ironed onto the top.Then I placed them colour side down on a stamp with Gladbake(baking parchment)on top and ironed again to get the stamped image into the Opals.Leave it in place till cool before peeling up.
 I then rubbed Radiant Rain daubers over the top in a contrasting colour and while wet buffed it off again so the colour only stayed in the crevices.The stamped Image is an Oxford Impression one
hugs
Annette In Oz
Tuesday, June 16, 2009
What It Is...an Angelina Film and Opals Covered Purse
My revamped purse is done.Such a shame the camera isn't capturing how shimmery and luscious the Angelina Film on the purse is to look at :o).I added the sewn on top and bottom edges since my last post and some Kaiser stick on rhinestones.I painted the wood at the sides,top and bottom of the purse with Golden Micaceous Iron Oxide.I then brushed on gold Schmincke and sprayed it with a fixative before gluing on the Angelina Film parts

 This is the view from top side
 Grant reckons he would get a good price for it on Ebay LOL
hugs
Annette In Oz....off to clean my gross oven...I'd rather Angelina Film it !

 This is the view from top side
 Grant reckons he would get a good price for it on Ebay LOL
hugs
Annette In Oz....off to clean my gross oven...I'd rather Angelina Film it !
What Will It
I'm not totally sure what all these things will end up being made into but they are on my desk..well OK its a very messy desk at the moment.I'm going to try and revamp this old wooden clutch purse with some Angelina Film.I've sanded it to give the surface some "tooth" for me to apply stuff too.
 Next I had a glorious few hours of inky fun and made all these yummy shimmery bits of Angelina Film pieces.I used craft Vilene(thin sturdy stiffening that I get at The Thread Studio..also were I buy Angelina Film) as the base and then ironed on some Vliesofix(fusible webbing that is used to attach two bits of material together)which is heat bondable on both sides.I peeled off the backing and then painted it with black gesso.When it was dry I ironed on some Angelina Film (I had no idea if applying gesso to the the Vilene/vliesofix would ruin its abilty to act as a "glue" when I ironed on the Angelina Film..but all was Ok) and then ironed on some Franklin clear Opals(from Pipe Dreamink).I then placed the pieces colour side down on a texture stamp and ironed it again leaving it on the stamp till it cools...the Opals melts and and sets again and the stamp imprint is left behind.These are all so gloriously pretty and shimmery,light,easy to sew and cut.They feel like leather to touch.

I then made a template out of card stock of the side of my wooden purse and cut some of my Angelina Film stamped pieces to fit the template.I don't have a very good sewing machine so I just attached the pieces to each other using a small zig zag stitch.I've settled for a green/purple colour on one side.The stamps I used are from After Midnight Art Stamps
 and a gold/copper look for the other
 Next I will paint the purse and then attach these pieces.I'll try to complete it later today and upload the end result...if there is an end result LOL
 Next I had a glorious few hours of inky fun and made all these yummy shimmery bits of Angelina Film pieces.I used craft Vilene(thin sturdy stiffening that I get at The Thread Studio..also were I buy Angelina Film) as the base and then ironed on some Vliesofix(fusible webbing that is used to attach two bits of material together)which is heat bondable on both sides.I peeled off the backing and then painted it with black gesso.When it was dry I ironed on some Angelina Film (I had no idea if applying gesso to the the Vilene/vliesofix would ruin its abilty to act as a "glue" when I ironed on the Angelina Film..but all was Ok) and then ironed on some Franklin clear Opals(from Pipe Dreamink).I then placed the pieces colour side down on a texture stamp and ironed it again leaving it on the stamp till it cools...the Opals melts and and sets again and the stamp imprint is left behind.These are all so gloriously pretty and shimmery,light,easy to sew and cut.They feel like leather to touch.
I then made a template out of card stock of the side of my wooden purse and cut some of my Angelina Film stamped pieces to fit the template.I don't have a very good sewing machine so I just attached the pieces to each other using a small zig zag stitch.I've settled for a green/purple colour on one side.The stamps I used are from After Midnight Art Stamps
 and a gold/copper look for the other
 Next I will paint the purse and then attach these pieces.I'll try to complete it later today and upload the end result...if there is an end result LOL
hugs
Annette In Oz
Sunday, June 14, 2009
Angelina Film Play
There are some lovely iridescent films on the market and I love the Angelina and Fantasy Films.They change colour with heat and can be used with stamps,to trap layers using glitters,fibres,faux opal flakes,and so much more.As a Mum to three kids I am often ironing so I incorporate this with my crafting of course :o).Today after the ironing was done I made these two cards.The first one has a Vintage image that has been printed onto bleached calico with an inkjet printer.The calico was treated with Inkjetset first to stop the colours bleeding and make it waterproof.I get it from The Thread Studio.At the edges I ironed on some scraps of Angelina Film(also from the Thread Studio) and then ran just the edges thru my Cuttlebug to emboss them with the swirly part.The image has some mica on top held in place with a brad and a Romance metal word at the bottom tinted with Ranger alcohol inks
 AAHHH no Eggplant colour here LOL
hugs
Annette In Oz
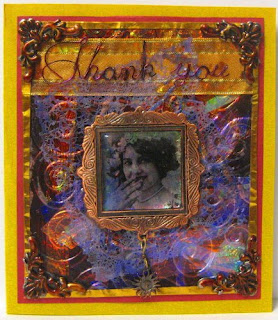
 This second one has more Angelina film ironed onto black card stock using Opals Franklin embossing enamel as the glue(Opals paper).I then ran the whole thing thru the Cuttlebug using a swirl embossing folder.In the centre there is a Franklin Opals transfer of a vintage image.The wire words and the metal corner trims are tinted with Ranger Alcohol Inks.The holey part under the image was done when I had set the iron too high and ironed some Angelina Film between baking parchment and had not realized...it was too hot and made it melt into honeycomb style holes....I liked it LOL so used it here.
 AAHHH no Eggplant colour here LOL
hugs
Annette In Oz
Sunday, February 22, 2009
Woven Heart
Well I did sit here all day and make that woven heart from the post below.It has Fantasy Film and Angelina Film woven in several layers to make the heart and background plus Opals.Also there is Angelina hot fix fibres under the house and around the heart,a faux lead light window at front of the house,hand sewn on beads, and words at edges imprinted using metal stamps and a hammer.It's amazingly shimmery and glistens in the light.I was aiming for a woven heart to represent the interwoven united hearts of all Australians who have reached out from all the corners of our country to those devastated and those souls lost by the Feb 7 bush fires in Victorian.They call that day Black Saturday now.

 Here is the faux glass window/door closed and a closer image of some of the detail on the front window
 The woven heart from front before I stuck it down
 and from the back


 Here is the faux glass window/door closed and a closer image of some of the detail on the front window
 The woven heart from front before I stuck it down
 and from the back
Wednesday, February 18, 2009
Stampersquest E-Zine Guest Artist Is...
ME and I was so delighted they asked....the full instructions for the canvas I made them are here at Stampersquest e-zine.Bea had some trouble when she loaded the pictures to the e-zine at her end and the contrast looks a bit wonky in some plus they wont open in a new window at the zine.So with her permission I have put them here so you can open them in a separate window if you like.To know what they are about you have to read the article though by clicking on the highlighted red link above that says "stampersquest" :o)
I actually made the canvas in early January before Bea asked me so I had to remake it and take step by step photos for the zine and now I have two canvas's the same.
On some photos I have the thing being photographed on white backgrounds and then repeated the photo on black.The colour shimmers more on black and makes it harder to take a photo without reflecting so that is why there are two front images here as well.


 <
< 

I actually made the canvas in early January before Bea asked me so I had to remake it and take step by step photos for the zine and now I have two canvas's the same.
On some photos I have the thing being photographed on white backgrounds and then repeated the photo on black.The colour shimmers more on black and makes it harder to take a photo without reflecting so that is why there are two front images here as well.


Subscribe to:
Posts (Atom)
LinkWithin
