Tuesday, March 5, 2013

Make Your Own Christmas Baubles Using Luminarte Primary Elements Polished Pigments / Tipnique Tuesday

As I have some Luminarte Primary Elements Polished Pigments to give away in my post below this, I thought this Tuesday I would share one of the MANY ways to use Luminarte Primary Elements Polished Pigments as my Tuesday Tip or Technique. As they are intensely pigmented powders made with mica and built in binders they are perfect to paint or use on non porous surfaces such as glass to make home made Christmas Baubles. This is also a great project to let kids help with. I originally learnt how to do this from the Luminarte website many years ago but it's no longer there that I can see but I think I can remember this one easily enough myself anyway.

            Materials

  • Clear empty glass baubles of choice. I got mine at Spotlight and some from the cheap shops.
  • Luminarte Primary Elements Polished Pigments or other coloured mica powder of choice such as Pearl-ex powders, Schmincke etc
  • Luminarte Simple Solution number 2 for fabric, glass and leather or other acrylic medium of choice such as Liquitex brand, Dimensional Magic etc
  • Baking sheet to protect your work surface
  • Disposable polystyrene cups that can hold your baubles while they dry.
  • Small spoon or Popsicle sticks to add powder to your bauble. Gloves if you don't want bright shimmery coloured fingers LOL.
            How Too
(1) Remove the metal cap from the bauble by gently lifting the tabs that hold them on the glass bauble.
(2) Place 1-2 teaspoons (depending on size of bauble-you can add more if need be) of Simple Solution into the bauble.
(3) Gently rock and roll bauble to coat the entire insides of the bauble with the solution.  Take Simple Solution lid off and allow excess drips to fall back into the bottle.
(4) Put gloves on. Place a small amount of 1-2 colours of Luminarte Primary Elements Polished Pigments into the bauble that has been coated inside with the solution and immediately place thumb on end and shake the powder around. Add some more powder if needed. to completely coat the inner bauble with powdered pigment.
(5) Place bauble up side down in polystyrene cup and allow it to dry completely. Reattach the metal cap and TADA you have home made baubles that are YUMMO.


You can further embellish the baubles any way you like. With some of mine I added Pipedreamink Opals Embossing enamels at the top and let it drip down the sides. THIS part is not child friendly so do this yourself.  I did this by applying Versamark ink directly on the glass and dip this then into Opals, sat it in my polystyrene cup and melted it with my heat gun. You can add more Opals Embossing Enamel powders by repeatingly adding more Versamark ink and Opals and remelting them till you get your desired effect. Be careful not to burn yourself as the glass can stay hot for a while so allow each layer to cool before doing another. As a final touch I glued beaded ribbon trim around the top before adding the cap back on or hung decorated Christmas themed glass tiles off side, punched metallic card stock with Christmas punches and stuck them on and added highlights on the Opals and embellishments with Kindiglitz.


There are a few other projects on my desk that I have used Polished Pigments on that I shall add here as I get them completed. In the image below I used an A4 sheet of black card stock, painted over the surface with PVA glue and sprinkled on Opals Embossing enamels and Polished pigments in similar colour ranges to each other and then heated it while it was still wet with my heat gun to make a lovely shimmery bg to use.


Then I used the bg to make a card and an ATC


The next two cards also have Polished Pigments on them. On the first card I used the Liminarte Primary Elements Polished Pigments as a paint to colour around the main image on my textured seamless Cuttlebug bg (oh there you go another technique to share with you at a later date!!). Fairy image is one designed by the ubber talented Zeborah Loray for After Midnight Art Stamps. 


And on this one the Polished Pigments are on the gauze around my Krafty Lady  mould and also painted on the scarf around the head. Krafty Lady moulds and Pipedreamink Opals Embossing Enamels are Autralian products but are available in the US from After Midnight Art Stamps.


This is just a taster of what you can do with the Polished Pigments but I hope its enough to get you inspired to have a go at entering my give away so you can own and play with some yourself :o)
hugs
Annette In Oz

Saturday, March 2, 2013

Classes with Finnabair 2013

On Thursday I again did classes with Finnabair and loved loved loved it. The Darwin classes were the first on Finn's amazing art tour thru Australia and New Zealand that were organized by Rae Cooper who lives in Darwin and runs the on line shop Scrapmatrix. After doing two days of classes last year with Finn and being influenced by "The Finn Effect" since I wasn't going to miss this years classes!. Poor Ania had just got in that morning from a 26hr flight from Poland but even though she was tired she did an amazing job. None of us were disappointed.

In our first class "Grungy Overload, Tea For Two" we made a wall hanging...well Ok for you scrappers its a fancy texture filled layout but to me its an arty wall hanging *grin*. We had amazing kits for both classes and got to play with lots of Finn's new Sunset, Sunrise and Mechanicals line (HINT-click on any highlighted links in my posts to go to that place). It was the Mechanicasl that had me most excited...all I could see was rings, necklaces and cuffs LOL. Anywho here is the first class projects pictures...


I think Finn was guiding us to a less is more effect but I got carried away. I'm quite shy and hate photos of me so I used a lovely dreamy vintage lady from my stash. We played with Finn's metallic coloured paper flowers, metal tags, metal numbers, zipper flowers, metal flowers, long brads(to make custom flowers!!), cogs, watch faces etc YUM!!

 Breaking for lunch came way too soon (you just want to keep playing rather then eat LOL) and before we knew it we were making journal covers with lovely textured layers made using stencils and gel medium, Finn's epoxy clear pebbles and more of Finn's mechanical line of goodies. The class was fast coming to an end but part of the process was spraying with shimmery mists on all the embellishments that were stuck on and then doing a final layer of Luminarte Silks acrylics. These are drop deep gorgeous highly pigmented colours with the same colour line/names as Twinkling H2O's and Primary Elements Polished Pigments. I had coveted these and added them to my wish list as soon as they were released so was so excited to get to see and use them at last.

Unfortunately my underlying sprays didn't dry quick enough even after using the heat gun so when I applied the Silks my end result looked rather washed out to what I had envisioned. It was time to leave before I could even try to do what I wanted with the Silks but at home I had a draw full of Luminarte Primary Elements Polished Pigments (highly pigmented powders with built in binders and shimmery mica, that can be mixed with Luminarte Simple Solutions or other art mediums or even with water to make your own shimmery sprays) and I knew I could change the effect once the project was completely dry. So this is how it looked at end of class...


Not too bad a look really and hubby preferred this look to what I changed it too but I wanted over the top colour and shine so yesterday I got out my Luminarte Primary Elements Polished Pigments and Simple Solution for Clay and Terracotta and this is how it looks now...


It has an amazing glimmer and shimmer that doesn't show in photos but you just want to run your fingers all over it LOL. Now its all dry all I need to do is cut holes were the binding goes (the holes were pre cut on the journal board but covered up with card stock) and then reattach the pages and binding again and its all done.

To any of you yet to do Finn's classes you will  ENJOY them so much. Thank you again Rae, Finn and all Rae's helpers. Oh by the way Finn loves Steam Punk stuff and I gifted her with one of my Steam Punk puffy heart necklaces...well Rae did it after I went home cause I got too nervous to do it myself!!! I hear she loved it which is totally awesome.

hugs
Annette In Oz


Tuesday, February 26, 2013

Steampunk Puffy Heart Necklac- "Burst With Love"

When I discovered the other lady who makes steam punk puffy hearts I had this one three quarters done on my desk with the keyhole, 3 small LED's and the propeller and cogs already soldered in place so it was a bit too late for me to change it much to make something like my Aviator Necklace below. I decided to just finish it as is by adding the twisted wires and tiny cogs at the top, some wings and a glass vial at the bottom. This is an etched copper heart attached to a brass base. As usual metal is hard to take accurate photos of. This shot is with the flash off and shows the warm pink it looks like IRL.


and this photo is with the flash on, which makes it look more orange coloured!


A bit closer


 View of the propeller...the propeller and the cogs have spacer beads between each one so all can move independently of the other parts.


 View of the keyhole


This is the tiny vial which has " burst with love" inside. I removed the bottom loop and attached the vial to the bottom of the heart by top loop.


I'm really liking the look of puffed metal. I have some other die shapes to try puffing  and hope to get to those soon.
hugs
Annette In Oz

Venetian Blind Card How Too / Tipnique Tuesday

Here is an easy and fun little interactive card. It took me only about 15 minutes to make this. Once done you pull the ribbons on each side and the card front folds up like a Venetian blind to reveal the inner message!

                      Materials
  • 300gm heavy weight card stock measuring 4and1/4inches by 11 inches
  • 1 and a half yards of thin ribbon
  • Ruler, craft knife, pencil, bone scorer craft mat
  • Inks, stamps and colouring media of choice
  • Cropodile or hole punch
                      How Too
1) Fold card stock in half so it measures 4 and 1/4 inches at top and 5 and a 1/2 inches at sides
4 1/4
5 1/2

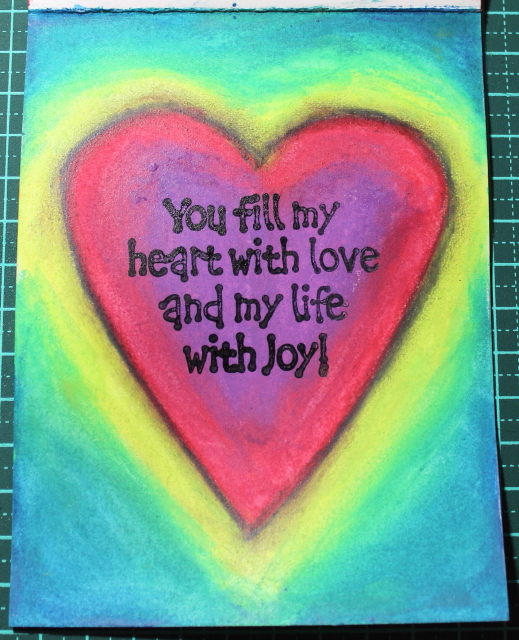
 2) Decorate the inner and outer card as desired. I used Caran D'Ache, Neocolor11, watercolour crayons and quickly scribbled on my design by drawing directly onto the card. This is my inside card design.


 I used an Aquash pen (water fallible paint brush pen) to wet the crayon covered surface and activate the colours and blend them like water colours. I always add the water wash to lighter areas first and blend into the darker areas. On the outside of the heart I used a sketch and wash water soluble pencil to define it more.


 Then I wet my finger and blended that in too. Stamp your sentiment in middle area of the card. I used Stazon black ink. Dry whole surface with heat gun and spray with sealant of choice.


For the front of the car. I quickly scribbled on colours and added a water wash with the Aquash pen going from lighter to darker. Then I stamped my words plus sprayed some Dylussions black spray into my hand and flicked it over the surface as well.  Dry whole surface with heat gun and spray with sealant of choice.


3) Measure and score at 1/2 in intervals down the inner top card.


4) Starting at score line just above the fold line, bend card back and press edge with bone folder.


On next score line bend card forward and press edge with bone folder.


Repeat all the way up the card


Turn card to the front and it should look like this.


5) Fold the card front up and punch holes on each side with the Cropodile or use a hole punch and punch holes all the way along both sides.


6) Pull front down again. Mark thru left and right bottom holes on card underneath and punch holes where you marked.


7) On bottom right thread ribbon thru all holes. I found this easier to do by bunching up the accordion folds so all holes lined up and thread ribbon thru. You can also use a tapestry needle with the ribbon threaded on.


Thread ribbon across the top under the fold closest to the card spine and thru all holes on the left side. In the image I have the card fully open so the ribbon you see going across will be underneath the when the card top is pulled down again.


Close card again. Adjust ribbon so you have about 2 inches left hanging at right and longest part at left.


 8) Now thread ribbon thru bottom left hole on base card, across the back and in thru the right card. It will look like this at back if you turned it over.


9) Go back thru all holes on right side, across inner top and back down left side again. Tie knots on each end of the ribbon.


10) TADA pull ribbons and the blind goes up.


This is a card I had kept in my tips draw to remind me of what it looked like completed. It was made 10 yrs or so ago so is a bit grubby.


If you don't like seeing the ribbon on the rear of the card just glue another piece of card stock there.


You can adapt this so the blind is made like a window such as this one here with a video tut too at Splitcoaststampers by Diane Zechman. Have fun!!

I'm off to play with some metal making and shall upload another puffy heart this evening to my blog.. Why do days off go too fast?
hugs
Annette In Oz xxxx

LinkWithin

Related Posts Plugin for WordPress, Blogger...