Wednesday, May 29, 2013

What's On Your Workbench Wednesday (WOYWW)

It's time for WOYWW  again where by arty folks across the globe share what is on their work benches. To read about this or join in go to Julia's blog here. It's very interesting spying on others desks and we are all so eclectic with our arty pursuits. My desk is pretty much the same as last week. I've finished another cuff and I am working on a new one. I haven't cleared away my metal working tools yet  but I need too soon so I can repair the painting at the back and make a mixed media card.


The double heart pop up card at the back was made yesterday and the how too is below this post.


There is a change to the right side of my desk as some parcels came including a Spellbinder's Artisan Xplorer machine...now to get some Susan Lenart Kazmer Media Mixage goodies. I also bought some new Tombows for colouring flesh tones.


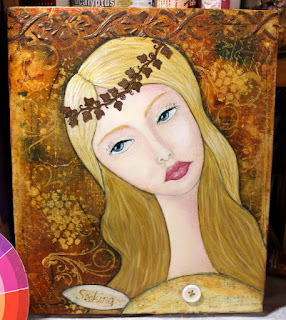
Behind my chair on an easel is a drawing I have just done over the last few days. It's an A3 sized one. I used to draw allot till I got married and had children and stopped. In the last 2 years I have started to draw again. I'm no where as good as I used to be but I am trying. I decided I couldn't do eyes well yet so I did this face drawing with her eyes closed...what a cheat hey?


Thinking I may revisit my old drawing and painting faces class info from an on line class I did with Paulette Insall and try to transfer this to a canvas and paint her at some stage. I'm off to check what is on others desks :o). I wont play WOYWW for 2 weeks as I shall be in QLD visiting my 81 year old Mum
hugs
Annette In Oz

Tuesday, May 28, 2013

Double Pop Up Heart Card / Tipnique Tuesday

Today I went right to the back of my tips and techniques book and found a much loved sample.of a double pop up heart card. I've remade this card  many many times for Weddings, Engagements, Mothers day and Valentine's day. It was made by Ellen Eadie originally.


                                    MATERIALS


  • One piece A4 card and a piece of A5 card (half the A4 card size) plus some scrap card. My scrap in the image is red but I changed to white after taking the photo so it would contrast better for the photos.
  • Ruler, pencil. rubber, bone scorer, scissors, cutting knife and craft mat
  • Ink of choice. I am using Stazon black.
  • Heart stamp-mine is 9.3cm wide and 8cm long from dip at heart top to point. Smaller hearts work as well. You could use a heart template or make a template by folding scrap card in half and free hand draw half a heart along the fold line and then cut it out. Use that as your template.
                               HOW TOO
1) Stamp hearts onto A5 sized card and carefully cut them out with scissors.


(TIP: when you cut out images go around edges with a black or dark grey marker. This makes the images more defined as well as replaces and edge you accidentally trimmed off!!)

2) Cut down the A4 card to measure 25cm by 16cm. If you have used smaller hearts adjust the width as needed once card is completed. Have card in landscape position, fold and score it in half. Open it up and mark a light pencil line 7cm to the right from the centre. I have used black ink so you can see it better. Put this aside.


3) Turn both hearts over. Make a pencil line thru the centre of each heart and then lines on either side of the centres at 2.5cm

 4) From your scrap card make two 6cm by 2cm rectangles. Measure, mark and score both at 2cm and 4cm points. Fold them to make "Ü" shapes.


5) On one heart apply glue to one support tab and attach it in place on the line at LEFT of the centre as shown so tab fold rests on line. 


6) Measure UP on line and make a mark on the right line at 3cms and cut from bottom up to that point with scissors. If your heart are smaller try a 1cm line or 2cm line cut.


7) On second heart apply glue to one support tab and attach it in place on the line at RIGHT of the centre  as shown so tab fold rests on line..  Measure DOWN and make a mark on the left line at 3cms and cut from TOP down to that point with scissors. If you are using a smaller heart try 1cm or 2cm cut.


8) On first heart fold the support to the right and apply glue to the far right tab only.


Attach in place on the base card at the 7cm line you marked so tab fold line rests on the 7cm line as per picture below. Make sure heart is low enough along the line to not pop out at top. Erase all pencil marks. As I used ink mine are still showing sorry.


9) Turn the heart back to image side up. Interlock both hearts where the splits are. Gently fold back the second heart onto the first one and have both moved to the right on your base card as shown below.


10) Press the support toward the left and apply glue to far left tab only. Leave the card this way and gentle close the card.


Open the card and you now have a double pop up heart card. Embellish before or after as desired and trim to a smaller proportion to suit whatever heart size you chose.


This card is simple just follow each step carefully. After you open it you may have to help the hearts collapse again as you shut it for the first few times and then it will be fine.
hugs
Annette In Oz

Saturday, May 25, 2013

Gelli Plates-sharing the LOVE

Morning all
I'm having allot of issues getting a good nights sleep due to pain and discomfort. Today I was awake at 4AM but came across this to share so maybe waking that early was worth it LOL. I think I seriously need...read WANT...MUST HAVE a gelli plate: Go have a look at this blog post and I'll add the Youtube video below the link just in case the link wont work :o)
http://tinyurl.com/olvuh32


hugs
Annette In Oz

Wednesday, May 22, 2013

What's On Your Workbench Wednesday (WOYWW) 207 Plus Winner Of Looper

I nearly forgot today is WOYWW and time to share what is on your work desk with other arty souls around the World. If you want to join in or know what WOYWW is go to Julia's blog. I'm still intermittently working on my hand made jewellrey but I have stopped a few times to do some paper crafting as well. This is how my desk was when I went in there at lunchtime today...rather unruly I think LOL.


The bright card at the left is this one and how to make these is below this post


At the back are some cuffs I made. The one at right was finished last night, the one at left was from last week and behind them is one I want to change and use the larger resin filled bezel on it, that is beside it.


Behind the cuffs at the right are an old painting I have done and a mixed media background awaiting decorating. I have the painting on my desk as I walked past it a few days ago and realized the edges have faded due to people picking it up off the shelf in my hallway. There are also some discoloured spots on her face. When I have my metal mania out of the way I'll pull out the paints and fix her plus finish the mixed media card
.


This cuff is one I was working on last night. It was one of the cuffs that needed repairing from last week. I've taken it off it's old etched cuff and will cold connect it to the new etched cuff. I'm about to drill holes in the old watch part (which is now filled with resin, bird image and tiny eggs) and then I'll attach it onto the new cuff. The wings and cogs are ready to go on as well to the left of it.


This is the sort of arty alchemy I create as I work ROFL.


Now onto who the winner of my spare 1 step looper...it was number 25 which is Ike. ...well unless she doesn't want it and then I shall generate another person to gift it too :o)


Off to snoop on others desks. Before I go my heart and best wishes go out to those affected by the tornado in Oklahoma....just so devastating to hear about the loss of lives...esp children...and see the damage. Also my hands only have a few scabs left yeha...they did prove impossible not to pick at!!
hugs
Annette In Oz

Tuesday, May 21, 2013

Pop Up Card or Place Setting Card Holder how too / Tipnique Tuesday

Into my large book of tips and techniques I went this morning and found a project I had actually never done myself!. Awhile ago I went thru my VERY large collection of magazines and pulled out projects that appealed to me, thru the magazine away (even if I was in it!) and this was one of those projects. It was from Stamping and Papercrafts but the page I have doesn't have by who. The project in the magazine was for making a place card holder but it could easily be used as a type of pop up card. As I have said before when I do tips and techniques I'll try to keep my samples simple so anyone starting on their stamping journey can feel they can achieve the project. Here is my sample:


               MATERIALS
  •  piece of card stock that measures 29cmx12cm. Start with A4 card stock and use the remaining piece to stamp or images to the center piece.
  • Ruler, pencil, rubber sharp craft knife, bone scorer and craft mat.
  • Double sided tape or roller glue.
  • Stamps and embellishments of your choice.
               HOW TOO
1) Measure and mark a dot on each long side of the 29cmx12cm card stock. Start at edge and measure in 1.5cm, then from that dot measure and mark a dot at 4.0cm. Continue along from each dot marking dots at 2.5cm, 4cm, 25cm, 2.5cm, 4.0cm, 2.5cm, 4.0cm and lastly at 1.5cm.


2) Score along all marked dots. Rub out dots.


3) Bend center scored line so it is a valley fold. Bend all other scored lines to make mountain folds. If you want to colour the card stock, stamp or apply rub ons do so now.


4) Apply glue or tape only to each 1.5cm end.


5) Fold each side over to ward back and press the glued area in place. Leave front center part unglued.


 6) Decorate you cut off card stock from the A4 card as desired and cut it down to fit in the slot you created above. Now apply glue to both sides of the slot.


7) Press decorated piece onto one side of glued area and then press other side against that


here is the completed card from the side.


These can be folded flat to fit an envelope after you have completed them.  If ANYONE wants this or any other tips and techniques I have shared on my blog, in a word document please just e-mail me (address at right) and I'll send that too you. :o). You can adjust the 12cm width to smaller or larger proportions to suit your needs.
hugs
Annette In Oz

Saturday, May 18, 2013

Blog change

Hi all
it appears the white writing on the black back ground causes quite a few people trouble in actually reading my blog so I'm trying a different look. If anyone can let me know what they think of this look that would be awesome ;o)
hugs
Annette In Oz

Wednesday, May 15, 2013

What's On Your Workbench Wednesday 206 (WOYWW) + A GIVEAWAY!!!

Sheesh it's Wednesday again and here I am sharing my messy desk for What's On Your Workbench Wednesday (WOYWW). If you want to know about this  or join in and share your desk  and snoop on other's desks around the World go to Julia's blog. It took up to yesterday till the pain and weeping sores settled from me having a bad reaction to having 21 skin cancers frozen off (burnt!! off).my hands and fingers with nitrous oxide. I now have lovely dry scabs everywhere but I can bend my knuckles again.

I had to take some photos of my desk yesterday and everything was neat and tidy as I didn't go in there to try and create till after dinner. On going in there today to take my photos  my desk is a wee bit of a cluttered mess as last evening I finished one of my cuffs. I must explain too that the room I create in is dark as it faces a very wide verandah. We had it made wider then usual as I live in a cyclone affected area so if one came close we can fit three cars out there to protect them BUT it doesn't let much daylight into my room. Even in the middle of the day I use 3 lights when I need to be in there :o)

 
This container of my steampunk goodies is sitting on my chair


Here you can see the finished cuff behind my soldering brick and I am about to solder my steam punk etched eye ball. At the back are my tiny screws, rivets and eyelets.


A closer look at the cuff. I have to clean up the excess resin drips yet but you get the idea.


I used to just use E6000 for attaching things to my cuffs or fine wire but this time I used tiny screws and nuts, then soldered underneath the cuff to ensure nothing falls off ever. With jewellery glue it does yellow a little over time and parts have fallen off in time too. I have a pain issue with my shoulders so I was very thankful I have a drill press and dremel to do any sort of work for me that involves putting pressure thru my shoulders at the moment. Hopefully the specialist I see next week can help me with settling that down.

At the top right of the craft mat is a jewellrey set I made in the past that needed a polish


Behind this is a new card that is a folded box that you open. Instructions to make it are below this post here


On the right side of my desk are some tools, more Ice Resin filled bezels and a puffy etched metal heart awaiting to be assembled soon. At the back right is Black Patina to age metal with and another few pieces of old hand made jewellery that need repair.


At back top left are some of my "torture" tools LOL


Oh and did I try the 1 step looper...well yes I did...it's an awesome tool. There is my first eye pin I have made with it...it's not the best sample as I forgot to bend back a little at the end to give it a better shape. In a twist I had a second 1 step looper arrive yesterday. I pre ordered the one on the left but got an error at the website saying it didn't go thru so I went to a different site and bought the other one.. Then after the second arrived I got an e-mail saying the first one had processed and was on it's way AAARRRGG


Since I now have two I think it's time for me to have a give away again. So please leave me a comment if you wish to be in the draw and I'll draw a winner for next weeks WOYWW.
hugs
Annette In Oz

LinkWithin

Related Posts Plugin for WordPress, Blogger...