
MATERIALS
- Translucent Liquid Sculpey (TLS) or other liquid polymer clay
- Toner copied image. I used a laser printer and my image is printed on Kodak gloss photo paper. Mirror image your print as needed and especially if you are transferring writing
- Baking parchment-I have used Glad Bake
- A flat baking tray, an oven and a oven thermometer. The TLS has a mild smell but is safe to use in your oven in a well ventilated room.
1) Heat set oven to manufactures instructions on your bottle of liquid polymer clay. I used the Sculpey brand so had my oven on 130 degrees Celsius (275-300 degrees F). Use an oven thermometer to check temperature is correct. Place baking sheet on baking tray, image on top and then squeeze TLS all over area you want to transfer


Gently spread it all out evenly and ensure there are no holes/air bubbles. I just used my finger to do this but you can use a palette knife etc if you want
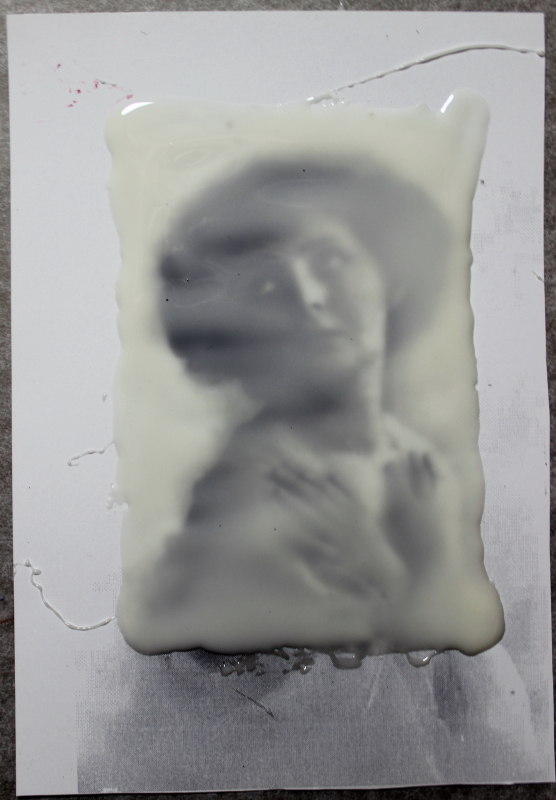
2) Place tray in oven and bake to recommended time on your bottle. TLS recommends 15-30 minutes so I cooked mine for 20 minutes. Remove from heat and allow it to cool to touch. As the TLC bakes it becomes more transparent.

3) Once cool peel off your transfer.


As you can see the transfer is see thru. You can colour it using permanent markers or other mediums if you want


I'll try to make my transfer into a card or something later in the day or the next few days and post it here. I think I may even sew it onto my background I have done above. As I have long had a love of making transfers I think there will be more tipniques featuring them in the future using other media as the transfer agent.
hugs
Annette In Oz

5 comments:
Thanks for sharing Annette. I have had the TLS for quite a while and never used it. Will give it a try now and will also try the cooking of the inkjet prints.
Wow! Such amazing cards! I love all the metal embellishments you used and colored and the gret vintage images. I popped below to see how you did the transfers. Thanks for sharing the info. I have had some success with the packing tape method, but this way looks so much better. I am glad I found you today! Winnie#70
wow Annette this is really great! love it! Shaz in oz.x
Thank you Annette for this great tutorial! I have had this for some time and not used it. I am anxious to give it a try. You make it look so easy and fun. Thank you for your generousity.
I was returning the favor of a visit and found I've spend some time here scrolling through your blog...interesting. Did you attend art classes? Working with tiny hardware, addictive I'd imagine. I'm intrigued by your work, but my craft abilities are limited to space available and income.
Enjoy your house guest, Annette and then you can play again. I'm the Jiminy Cricket that just joined your blog. Be well C
http://carolescreativecritters.blogspot.com/
Post a Comment