SPRING UP CARD
SUPPLIES
- Base card stock. Whatever width you want it double the measurement for the height. So mine is 11.5cm by 23cm. It's the same wether you use inches or cms eg;4x8inches etc etc
- Pencil, rubber, ruler, craft knife, craft mat, glue and bone folder
- Stamps/images and papers of your choice
HOW TOO
1) Have card in landscape position so short edges are at the sides. Fold card in half and use bone folder to crease the folded edge
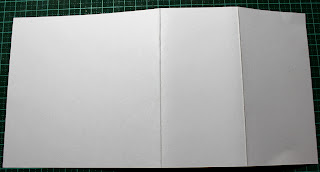
2) Unfold card. Fold right side into centre crease and use bone folder to crease the folded edge.
Turn it over
3) Take top left and align it down along the first crease on the right side. Press folded line with bone folder.
Take bottom left and align it up along the first crease on the right side. Press folded line with bone folder.
Open it back up and it should look like this
4) Place it in the portrait position with the section with uncreased area at bottom. Measure and mark a dot at the half way point and draw a light line from here to the points created from the creases at either side. I've marked mine with black ink so you can see what I mean.
Use your ruler and craft knife and cut this area away. Turn card so diamond shape at top. Rub out any pencil marks
Gently fold the card into shape as per below.
5) Bend the diamond shape to the back and apply glue only to the triangle area at top not below the fold line.
Press this down onto bottom section so diamond pops up. decorate as desired :o)
A quick simple card with enough WOW to make the recipient happy.
hugs
Annette In Oz


7 comments:
Thanks for another fabulous technique. Glad the weather is a bit kinder to you.
Thanks for the great tutorial. I have made one of these many, many yeas ago but had completely forgotten about it. Thanks for revisiting an old fold.
What a clever idea I may be borrowing this one Annette! Love the cute dog too! Have a great day! x
Thanks Annette,
I've never done one of these but will try it out tomorrow.♡♡
That face! Oh my, he is just precious!! Thanks for sharing the technique to that fold. I can't wait to try it this weekend.
Hi Annette,
Thank you so much for your nice comments about my art, your blog is so inspiring, I hope to participate in more of the WOYWW fun!
Hugs,
Michelle
I was just visiting your Wednesday post and this sad little dog image caught my eye. Thank you for a clear tutorial to make this simple but clever card. Kate x
Post a Comment